
Nowadays most iPod converting software is increasingly popular as the renewing of iPod generations. This guide is written for users to learn clearly about how to use Pavtube DVD to iPod Converter and general iPod knowledge as well.
Before you convert the DVD to your iPod, the general knowledge of DVD and iPod may benefit you.
About DVDDVD generally stands for Digital Video Disc or Digital Versatile Disc. There are VOB, IFO, BUP files in the folder named VIDEO_TS, under the DVD folder. The VOB files generally contain showing data like video, audio, subtitle, etc. The IFO files contain the navigation information of how the data show up. The BUP files are the backup of the IFO files.
About iPodUnder the iPod brand, Apple has released the hard drive-based iPod classic, the touchscreen iPod touch, the video-capable iPod nano, the compact iPod mini and the screenless iPod shuffle. The iPod can play MP3, AAC/M4A, Protected AAC, AIFF, WAV, Audible audiobook, and Apple Lossless audio file formats; the fifth generation iPod can also play MPEG-4(H.264/MPEG-4 AVC), mp4 and QuickTime video formats, with restrictions on video dimensions, encoding techniques and data-rates.
Step1: Download and install Pavtube DVD to iPod Converter
.
Step2: Load DVD video.
Insert a DVD of your choice; run the program, and click Load DVD or Load IFO for the entire DVD or just some titles.
Step3: Choose the output format and advanced settings.
You can choose one of the iPod formats which you need.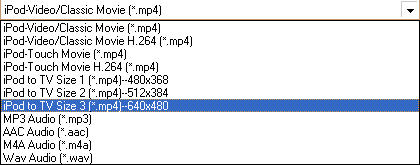
Click on the "Settings" button for the advanced settings like video codec, bit rate, frame rate, aspect ratio, audio codec, bit rate, etc. Just click on the item you want to specify, and a drop down button can give the perfect setting to you.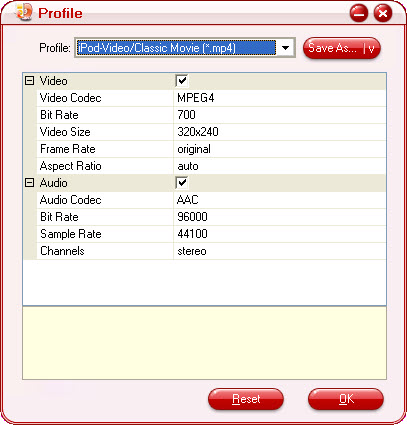
For example, the fifth generation of iPod supports the following settings:
H.264 video, up to 1.5 Mbps, 640 by 480 pixels, 30 frames per sec., Baseline Low-Complexity Profile with AAC-LC audio up to 160 Kbps, 48 kHz, stereo audio in .m4v, .mp4, and .mov file formats;
H.264 video, up to 768 Kbps, 320 by 240 pixels, 30 frames per sec., Baseline Profile up to Level 1.3 with AAC-LC audio up to 160 Kbps, 48 kHz, stereo audio in .m4v, .mp4, and .mov file formats;
MPEG-4 video, up to 2.5 Mbps, 640 by 480 pixels, 30 frames per sec., Simple Profile with AAC-LC audio up to 160 Kbps, 48 kHz, stereo audio in .m4v, .mp4, and .mov file formats.
You can change to the above settings with MP4 as output format.
Step4: Set output path.
Click on the browse button to change the output folder for the conversion.
Click on the "Open" button to open the folder directly.
Step5: Preview and take a snapshot of the movie.
You can preview the whole movie or just some titles on the right pane of the main interface. Double click on the file name, or select a file and click the play button under the preview window to play the video. Then, decide the files to convert and check the titles and chapters for conversion.
If you want to save some image for thumbnail or wallpaper, etc., you can capture the image when you previewing the DVD movie by clicking the Thumbnail button under the preview window.
Step6: Change subtitle, audio track and angle.
If the DVD movie includes subtitles and audio track with more than one language, just click on the option box to select the language you need, and check through previewing the movie.
If the DVD movie has been recorded with different angles, you can choose a preferred one to enjoy.
Note: Most of the DVD movies now do not include multiple angles, as it takes more work and the angles occupy disc space.Tick the checkbox for "Merge into one file" to get the checked chapters with the selected duration and effect in one output file. The output file will be named with that of the first checked file in the sequence.
Step7: Customize Settings: effect, duration, image.
Select a file, and click on the "Customize" button, and then you can change the visual and audio effect directly.
7.1:Change Brightness, Contrast, Flip and Audio Volume under the "Effect" tab.
7.2: Change duration under the "Trim" tab
7.3: Crop image
Step8: Change preferences settings: max process and thumbnail.
You can change the preferences settings of all files and the ripper, after choosing Options﹥Preferences.
Step9: Start conversion
When you get all the settings to your choice, click on the "Start" button and the checked files will be listed on the "Ripping" window for conversion.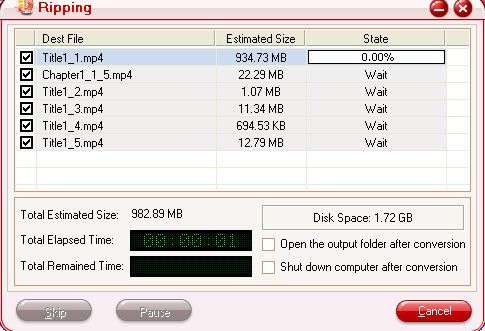
Note: You can set to directly open the output folder or shut down computer after conversion.
After the conversion, you may sync the output files to your iPod via iTunes.
Professional audio and video solution for personal entertainment!